Adding Nodes/Centroids
In this tutorial, we will look at how to add a node and centroid to a CUBE highway network in the GIS window.
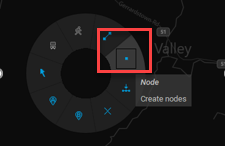
1. To create a node, make sure Toolbar > Node option is turned on.

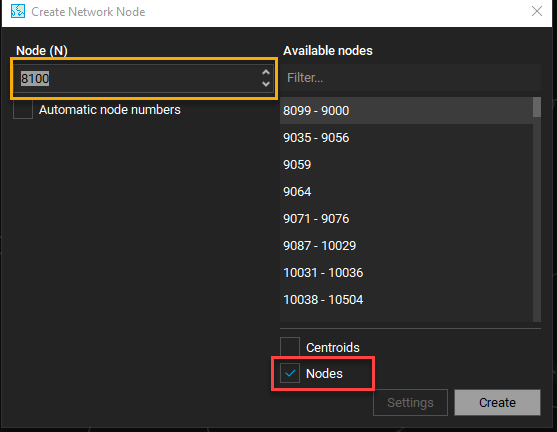
2. The Create Network Node window should appear. Make sure Nodes is checked in the lower-right. In the upper-left box, enter a value that satisfies from the Available Nodes criteria.

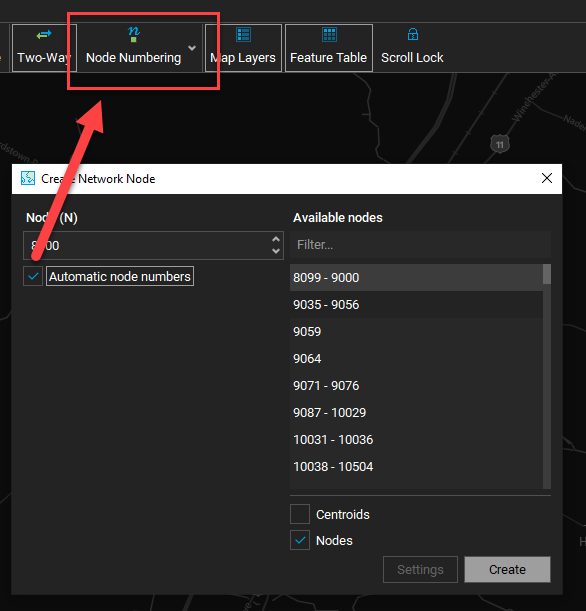
3. By default, the Automatic Node Numbers option is turned on. There is a box surrounding the Toolbar > Node Numbering option. By checking the box, CUBE will disable the automatic node numbering option. Turn it off for now and repeat step #1. When you create a new node with the box checked in Create Network Node window, the box will appear around the Toolbar option.

4. To create a centroid > turn off the Toolbar > Node Numbering option.
5. Repeat step #1.
6. At the window again, check off the Nodes and check the box for Centroids.

7. Enter a value that satisfies from the Available Nodes > click Create.
